Monday, April 25, 2016

The Kitchen - Demo begins...

The Kitchen - Demo begins…

For those of you who know Dan and I well, you know that we are NOT handy when it comes to house projects.  I like to watch Fixer Upper and pretend I know what I'm doing.  I know in my head what I want, but I have no idea how to get there on my own.  Although Dan has grown to enjoy my love of old homes, he would prefer a house that is maintenance free.

Here we are pretending we know what we are doing.  We decided to do some of the demo ourselves to save money.  I went to Home Depot and asked what we needed to remove the tiles and they gave me a crow bar and some safety glasses.  We were happy to say goodbye to the fruit and vegetable backsplash.


Next we removed all of the cabinet doors.  This took longer than we anticipated because the hinges were very old and had several coats of white paint on them. 


Although I am very happy to see progress, we have to live in this kitchen with missing doors for the next few weeks.  We have installed baby gates preventing Maddie from pulling everything out of the pantry, but Dan and Benjamin are always eating everything in sight…because it is there in plain sight waiting to be eaten.  


Do you remember the movie The Sixth Sense? "I see dead people"…Well, Every time I walk into my kitchen now I think of that scene where the ghost opens all the cabinet doors.  It really freaks me out! I can't wait for the professionals to arrive to really get this project rolling.  The rest of the demo (L-Shaped Cabinet, Counter, Sink and floors) will happen next week.


We have trusted Jim Sollberger http://sollbergerconstruction.com to do a number of projects on this house and our last house.  He knows all the area businesses and gives us several phone numbers of people we can call for our various projects.  Jim will complete the demo and will also do the backsplash, trim and baseboards.  We may even have him replace the kitchen window.  He specializes in old homes as well as new construction and knows how to build with the type of quality construction that was used back in 1910.

We will be using Showcase Kitchens http://www.showcasekitchensgb.com for the cabinet installation and white shaker style cabinet doors.  I changed my mind on the hardware last minute, so instead of the trendy pewter hardware I will be using a classic matte black iron.  This week we will take everything out of the cabinets, create a makeshift kitchen in the dining room, and paint the inside of the cabinets white. I have stocked up on paper plates and plastic forks.  Our sink, counter and stove will be out of commission for about a week.  Stay tuned for more demo.  It will get worse before it gets better.

Thursday, April 14, 2016

Kitchen - The Island and Plan for Remodel Project

When we first looked at this house we knew the kitchen needed work.  Kitchen remodels often scare people away because of the cost, decisions, time without a kitchen, and the mess!  I really enjoy cooking and it makes a world of difference to have a functional kitchen.  The kitchen is where everyone gathers and is the heart of the home. This is the first time I have remodeled a kitchen and I'm a bit nervous about it.  I just have to keep in mind that all this hassle will be worth it in the end.

The kitchen at our old house had beautiful tile floors, black granite countertops, and a layout that made cooking easy.  I hope I can make this kitchen just as beautiful.  No matter how much I disliked the kitchen in this house, I didn't want to remodel it right away.  I needed to cook in it awhile to discover what I liked and didn't like about it. When the kitchen is done the entire first floor will be complete!

Here is a picture of the kitchen after we moved here. There are fruit and vegetable tiles on the backsplash.  The countertops are wood grain laminate. The cupboard doors were painted many layers of white paint. The flooring was probably black and white at one time, but now looks dingy and yellow.  It is cracked and beyond repair.  I actually lived with all of these things just fine.  The thing that bothered me the most in the kitchen was the L-shaped cabinet and no prep space or storage. 


Here is a photo of the L-shaped cabinet.  By the way, what on Earth am I supposed to put on those little shelves that my kids aren't just going to knock on the floor?  This whole L-shaped cabinet with shelves needs to go.  I can't even put the silverware in the drawers when the dishwasher is open.  My plan is to replace this cabinet with a straight cabinet that has several large drawers.  This will also allow for a larger walkway and easier access to the pantry.

To address the prep space problem, I found this yellow island on Craigslist. The Island has extra storage and a butcher block top! I can now prep near the refrigerator, stove and sink.    When we need a quick snack or lunch or weeknight meal we eat in the kitchen. We reserve the formal dining room for dinner. The only problem with the island was the color. I painted it black which will look great with the other changes I'm planning for the kitchen. There are two spots to sit at the island, but these stools were too tall.


I added some new industrial looking adjustable stools.  I painted the fruit and vegetable tiles because I couldn't look at them anymore. Ha! The backsplash will be removed and replaced with old looking wainscoting and trim. Ugh, that terrible florescent ceiling light!!!  I forgot to mention that I really dislike the lighting in the kitchen.

It is important to me to give the kitchen an old feel even though I will be putting new things in it.  This historic home deserves a kitchen that fits the rest of the house.  Here are a few photos I'm using for inspiration for the new kitchen:


Here is the plan for the kitchen remodel:
1.   Remove and replace backsplash
2.   Remove the flooring and refinish the hardwood floors underneath
3.   Remove the L-shaped cabinet and replace it with a straight cabinet with drawers
4.   Replace countertops sink, faucet 
5.   Replace all cabinet doors with shaker style white painted doors.
6.   Replace all hardware with pewter cup pulls and knobs
7.   Paint Walls Revere Pewter and the inside of the cabinets White.
8.   Add trim and tall baseboards
9.   Replace lighting above the island and above the sink
10. Enjoy a dinner in the new kitchen!

This process will take several weeks.  Our goal is to be finished by Memorial weekend.  I will make several posts about our progress.  Wish me luck!

Thursday, April 7, 2016

The Office

***I recently re-named my blog americanfoursquare1910.blogspot.com

I couldn't think of a blog title when I first started this blog, but thought I would change it to incorporate the old house I'm always talking about. I hope you all continue to follow me.  Please feel free to make comments on my Facebook posts or in the blog itself.  I'm always looking for new ideas and appreciate your comments.  Thanks for reading my blog!

The Office

Sorry I haven't posted in awhile. I've been super busy these last few weeks picking out items for the kitchen remodel.  More to come on that in May!  Stay tuned.

Our home office is also a mud room, storage closet and includes a half bath.  It is the first place we typically enter our home and quickly take off our shoes and coats and drop whatever we are carrying. You can imagine the things that get left in the office.

At one time, before the house was moved, the office was just a porch on the back of the house.  A new foundation was poured and it included a foundation under the porch.  Great idea!  By doing this, they were able to add heat and plumbing.  Down in the basement, we have a workshop area which is nice for all of our home improvement projects.

The office has hardwood floors, but the owners before us put down these stick tile carpets and used the space as a den instead of an office. They left some extra carpet squares in our basement. That's great! I can replace the squares when they get dirty. I just replaced 4 squares by the door this week. The box said they are from www.flor.com so we can easily order more when we need them. The hardwood underneath is damaged from years of snow, salt and rain.  Even if we did refinish the floors, it would be pretty difficult to keep them looking nice.  For now, we really like the carpet.

The office tends to collect all sorts of odds and ends, so my goal this week was to get rid of the clutter, hide the printer in the closet, and make the office a more inviting place to work. I will spare you the before picture of the mess.  I had to toss, file and throw out a bunch of stuff.  I found two lamps that I wasn't using and added them on each side of the window.  Now I don't have to work with a bright ceiling light all the time.  I just feel more calm and relaxed when I work under lamp lighting. I hid the printer in the closet and added a plant to the desk.


The long desk above isn't anything special, but I really like it because I made it myself!  I went to Menards purchased two 8ft boards.  I brought them home, stained them with stain I already had from another project, and placed them over my file cabinets.  Instant rustic-looking desk!  The stool underneath is adjustable and has metal legs and a wooden seat with a similar stain color.  We have two more stools like this by our kitchen island.


I centered the desk under the window so I could look out into the backyard while I'm working.  I can see the playground and our "sliver of the river" between the other houses.  That's what we lovingly call our water view. Ha! We can actually see the sunsets and water view much better from our second floor windows. Here is a picture of today's sunset.


The other desk is tucked in the corner because it has our computer on it and needs to be near the internet cords.  The big chair is for Dan because, like the recliner, he enjoys comfort over my design ideas. ;)  It was important to both of us that we each have a place to work in the office.  Hence the his and her desk situation. I actually work by the computer most of the time.  When we both have to work it is nice to have a second desk.


This other desk has an interesting story.  My Grandfather found it on the curb and gave it to me when I was just out of college.  My Grandfather was a really good "trash to treasure" kind of guy.  I think of him whenever I see something that could be repurposed. The desk is very heavy and solid wood.  It was dark redish-brown and probably a child's desk because it was really short.  Fortunately, I worked at a school and the students in the Tech Ed class were able to add to the bottom of the desk for me.  I painted it black and added new drawer pulls. This old desk has been with me for 15 years! 


The back door lets a ton of natural light into the office.  I placed a rug in front of the door to prevent some of the dirt from tracking in and onto the carpet.  I added a row of hooks for coats and things.


  We found the old looking key at a cute shop in Door County, WI.  It is nice to have our keys in one spot.  I also used some velcro command strips to hang our garage door openers on the wall.  We were always losing them.


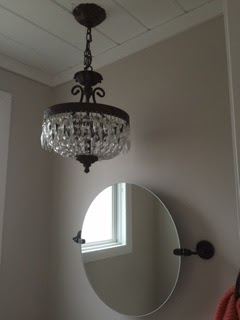
On the other side of the office we have a large storage closet.  That is where I hid our printer and a bunch of other stuff we don't use very often.  We also have a half bathroom.  It is very small, but it's great to have a bathroom on the main floor.  I added the mirror and pretty chandelier light.


Well, I hope you've enjoyed the tour of the recently organized office.  I thought I would take pictures and share them with you before it gets all cluttered again.  Watch for my kitchen posts.  I've never done a kitchen remodel before and I'm excited about what this old house might be hiding under our kitchen floor.  Stay tuned!


Friday, March 18, 2016

Trees: The good, The Bad and The Ugly

Trees:

I spent a lot of my childhood learning about trees. This knowledge has helped me when it comes to the landscape around our home.  Growing up we heated our home with a wood burning stove in the basement. Most Saturday mornings my father would wake me up before dawn so we could cut a load of wood. In the process my father taught me all about trees.

When most people look at trees they typically see the trunk, branches, and leaves.  People may enjoy a tree for its size, its beauty, its shade.   I often find peace in nature especially when I'm around trees and water.  I found this on the Power of Positivity site and it reminded me of how many great lessons we can learn from trees.


I took this photo below at Voyager Park a few years ago.  I sat on this bench for awhile to relieve some stress and suddenly felt a feeling of peace coming over me.  As I walked away I turned around and took a photo of the changing leaves with my cell phone.  It wasn't until I downloaded it onto my computer that I saw the ray of sunshine through the trees pointing right at the bench where I was sitting.  


Although I really do have an appreciation for trees and nature; after owning several homes, I now look at a tree and I think of the problems it may cause my home. The root system underground is at least as big, if not bigger, than what you see above ground.  I also think about the type of trees in a yard.  Do they lose their leaves? How much raking will they require? Do they lose anything else? Crab apples? Walnuts? Do the tree branches need trimming? Are there any dead branches that may fall down or do damage in a storm? Are there branches touching the house, wires or gutters? How old is the tree? Will it get bigger? These are the questions I now think about when buying a home or planting new trees.

The Historic District has a specific list of trees that they want to continue to flourish in the neighborhood. Although I plan to respect this list when we add new landscape, I am more concerned about which trees need to be cut down.  My priority is making our home last.  When we moved in, only a foot from our garage stood a giant black walnut tree.  The root system already damaged and busted the concrete in the garage.  Concrete has nothing on live tree roots. A tree will always win no matter how well your home is built. The walnut tree made great shade in our back yard, but also dropped golf ball sized walnuts.  These walnuts can cause damage to a roof and can even put dents in vehicles. Once the walnuts land they crack open.  If it rains before you can pick them up, they turn into a black stinky mess all over the yard.

Years ago black walnuts were soaked in water and used to make wood stain.  The walnuts themselves can be eaten and the wood from the tree trunk can be sold and made into high end furniture. The original owner of the land on this block (According to my neighbor Claire - Her father owned this land) planted a walnut tree in each lot. I'm sure he hoped to make money on them, but in my eyes these trees are nothing but problems. For me it was an easy decision-the tree had to come down.  We hired professional tree cutters to remove the tree piece by piece. We kept most of the wood for our fireplace, but sold the trunk to offset the cost to cut it down.  I don't feel too bad because Claire cut down the walnut tree in her yard too.

We also took down a crab apple tree in the front yard because the red crab apples landed on our sidewalk.  The movers unknowingly got them on their shoes and stained our carpet. The tree also prevented light from coming in through my favorite window. Despite its beautiful flowers in the Spring, it had to go. Finally, we trimmed the pine tree in our front yard so the branches weren't touching the gutters. We have been slowly making progress on our yard, but I plan to do more research before I plant anything new.  I apologize if our yard looks a bit bare at the moment. Hopefully, if I make the right decisions, I can make this home last and prevent issues for future home owners.


Thanks for reading about my thoughts on trees: the good, the bad, and the ugly. Do you have problematic trees in your yard? I would like to hear about them.  Also, please post a comment about your favorite types of trees so I can research them and see if they are on the Historic District list.


Tuesday, March 15, 2016

Mixing Hardware and Lighting Finishes


Mixing Hardware and Lighting Finishes:

This is from an article on Houzz.com
Go Ahead: Mix Your Finishes

When people say all white kitchens look alike, I can't disagree more. Just changing the finish of the hardware completely changes the look of a kitchen, even when the hardware is exactly the same style.

Depending on the other finishes in your kitchen, you may consider satin nickel, polished chrome or nickel, or oil-rubbed bronze. Don't feel like you have to match the cabinet hardware to the lighting or plumbing fixture finishes. I like to mix finishes by using antique brass light fixtures and polished nickel pulls to give a kitchen a more collected-over-time feel.


Who knew that my house, with all its varied lighting and hardware finishes, was so trendy! Ha! I hardly believe that my old home is setting any trends, but I like to think the hardware and lighting finishes have indeed been collected over time.  I actually don't believe much thought has gone into this "collecting". As far as I can tell, each homeowner replaced lighting and hardware with the trend at the time instead of what was original to our home.  I am guilty of this myself.  


Lighting

This foyer light is original to the home.  The glass in it is incredibly heavy and has a painted brass finish that matches the original door knobs.  It is rare and I would probably cry if something happened to it.  Some people have told me to replace it with something new, but I just don't have the heart to take out any original light fixtures.  It will stay in our home as long as it works and as long as Dan and Benjamin don't throw a football into it. 


These 3 fixtures are fairly new and all have a bronze finish. I added Edison bulbs (circa 1910) to the dining room fixture and removed the candle globes that were around the lightbulbs.  It's a bit of a current trend, but at least it nods to the time period of the home. I haven't decided what kind of fixture I want in the dining room yet, so for now this will have to do.


The bronze school house light is in our hallway upstairs.  It is a nice addition to this home and looks old even though it is new.  I found the bronze powder room light on clearance at Menards for $30.  I love a good deal.


I am not a fan of ceiling fans.  We have one in each of the bedrooms upstairs and they all have different finishes…bronze, white, brushed nickel, and brass.  We added the white one with the medallion to the nursery.  At least the medallion makes it look old.  They do help the air circulate upstairs, so I understand why previous home owners added them.


Hardware

These brass door knobs are original to the home.  They are tarnished and have paint on them from someone who was too busy to unscrew them before painting the doors.  I often wonder why someone painted all the doors.  I'm tempted to have the doors sandblasted or strip all the paint off them just to see what they look like.  All of our trim and 5 panel doors were painted long before we moved here.


We added these new doors handles and locks when we moved in.  I promise to remove them when I paint our entrance doors.


Here are some of the other door knob finishes in our home.  Brushed nickel and 80's brass.


Now, my dilemma is what do I do with all of these finishes?  Do I work to bring everything back to the original antique brass look?  Do I keep adding to the collection?  With the upcoming kitchen remodel I keep debating over what kind of knobs and pulls to order.  Right now I'm leaning towards Bronze and Glass knobs and bronze pulls.  I don't want to introduce yet another finish into the home.  I think if anything I want to get the home down to the original antique brass and the bronze finishes.  That would look deliberate without looking matchy, matchy.  It would only require replacing a few door knobs and eventually the ceiling fans and dining room light.  Anyone know of good places to find old looking hardware and lighting?